Step 1: Choose a Text Editor
Choosing out a text editor to use as you create the HTML file is the first step in the process. It is common practice to use a specific software, such as a text editor, to write and edit text documents.TextEdit for Mac, and the Notepad for Windows or many text editors are available. Select a text editor that you are comfortable using.
Step 2: Create a New File
Once you have chosen a text editor, then the next step is to create a new file. To do this, open the text editor and select to file > New. then start writing your code.
Step 3: Add the HTML Structure
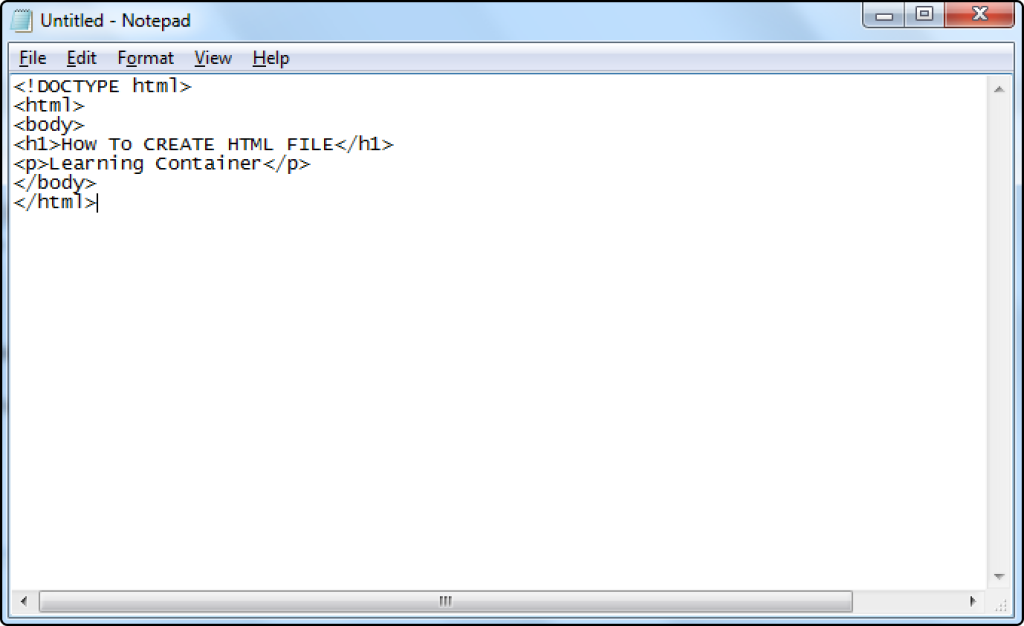
Next step is to add the HTML structure in your file. Among the fundamental elements of an HTML document are the doctype declaration, the html tag, the head tag, and the body tag. What your code should look like is as follows:
<!DOCTYPE html>
   <html>
      <body>
          <h1> How To CREATE HTML FILE </h1>
          <p> Learning Container </p>
      </body>
   </html>
if you want to more sample html file for testing visit here. https://www.learningcontainer.com/sample-html-file-download-for-testing/
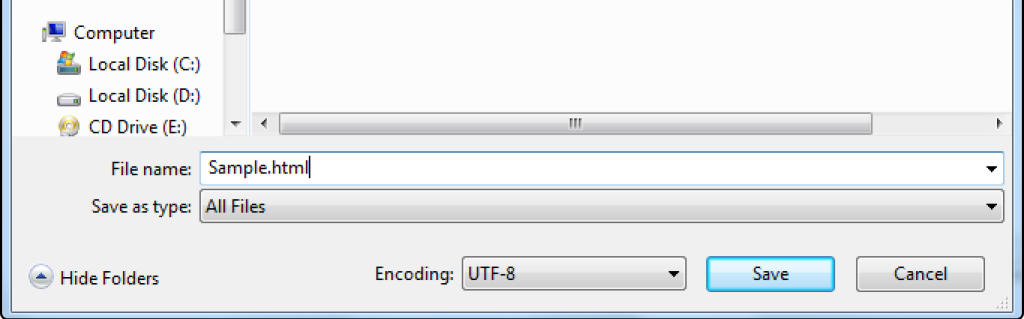
Step 4: Save the File
To save a file, go to file > save or CTRL + S and choose a location where you want to save. Make sure the file name ends with the “.html” extension.
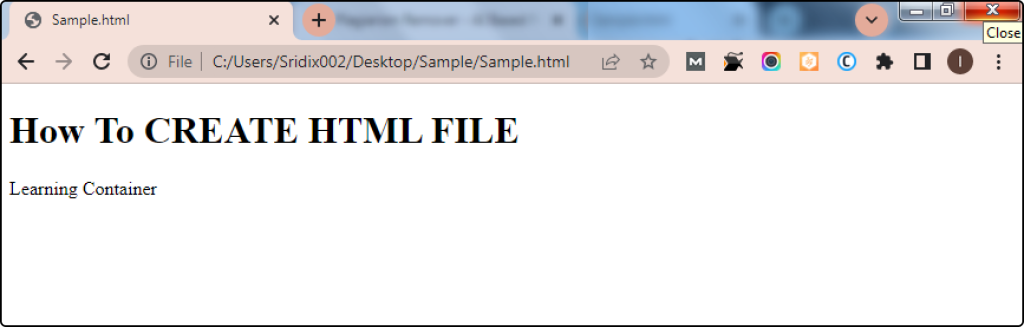
Step 5: View your html file
To open the saved html file, go to your file location where you saved the file. Then just double click on the file or right click > open with and select your favourite browser.
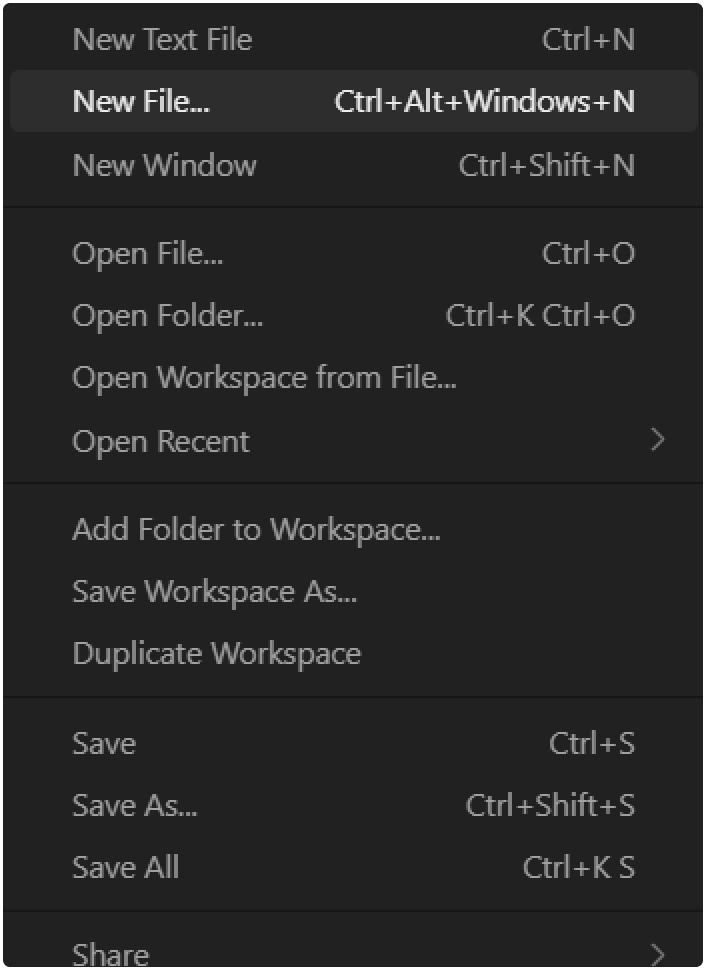
Step 1: Choose a Code Editor (IDE).
Choosing an IDE to use as you create the HTML file. Here multiple software, such as a VS Code, Xcode, Sublime Text, PyCharm or many code editors are available. Choose a code editor that you are comfortable using.
Step 2: Create a New File
Once you have chosen a code editor, then the next step is to create a new file. To do this, open the text editor and select to file > New. then start writing your code.
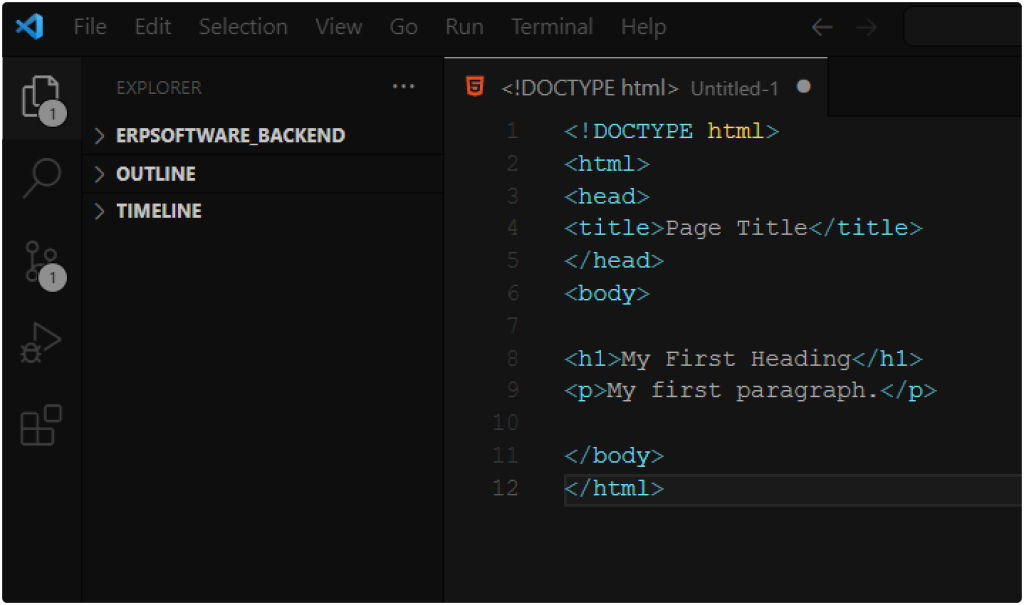
Step 3: Add the HTML Structure
Next step is to add the HTML structure in your file. What your code should look like is as follows:
<!DOCTYPE html>
<html>
<head>
<title>Page Title</title>
</head>
<body>

<h1>My First Heading</h1>
<p>My first paragraph.</p>

</body>
</html>
Step 4: Save the File
To save a file, go to file > save or CTRL + S and choose a location where you want to save. Make sure the file type in “.html” extension.
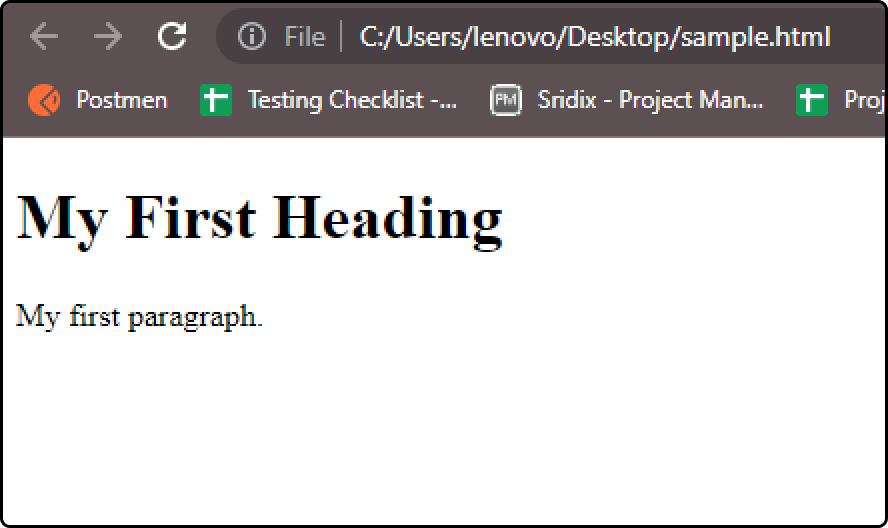
Step 5: View your html file
To open the saved html file, go to your file location where you saved the file. Then just double click on the file or right click > open with and select your favourite browser.

I am Dainik Patel, a full-stack developer and CEO of Sridix Technology. I write all the articles on Learning Container based on my real-world experience in web development, REST APIs, and scalable applications. My goal is to share practical, easy-to-understand, and reliable content to help developers learn and solve problems efficiently.